Active Directory Domain Services (AD DS) stores directory data and manages communications between users and the domain, such as user logon processes, authentication, and directory lookups. An Active Directory domain controller is a server running AD DS.
This article shows you how to create and configure a user profile by using Active Directory Domain Services in Windows Server 2016.
How to install Active Directory Domain Services in Windows Server 2022
- Log on to the Windows Server machine.
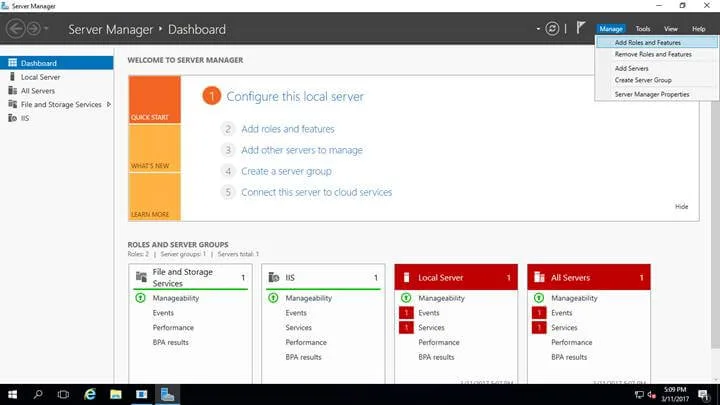
- Navigate into Server Manager.
- Click Manage > Add Roles and Features.
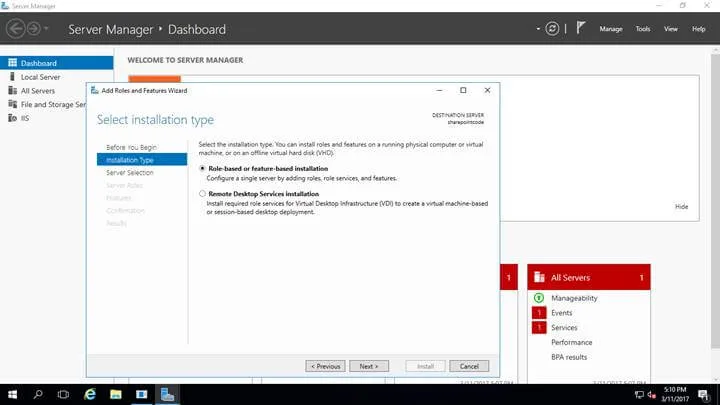
- Select a role-based or feature-based installation, then click Next.
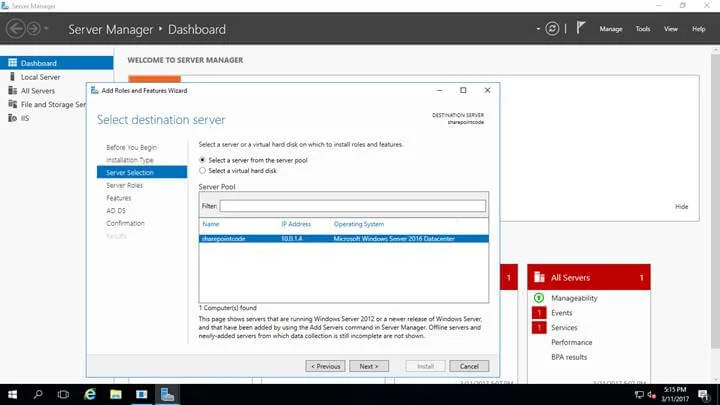
- Click the server from the server pool, then click Next.
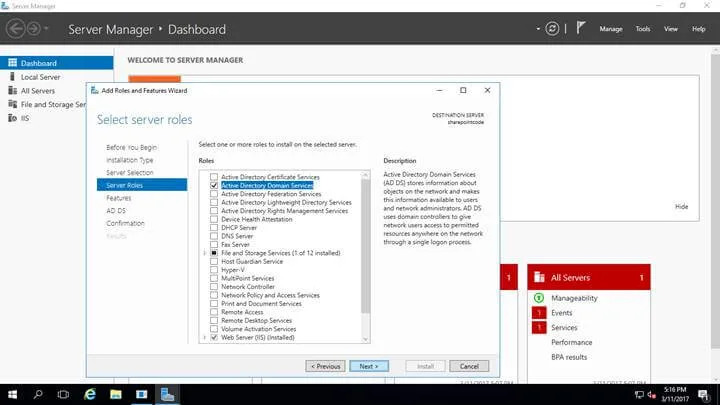
- Check Active Directory Domain Services, then click Next.
- See the screenshot and click Next.
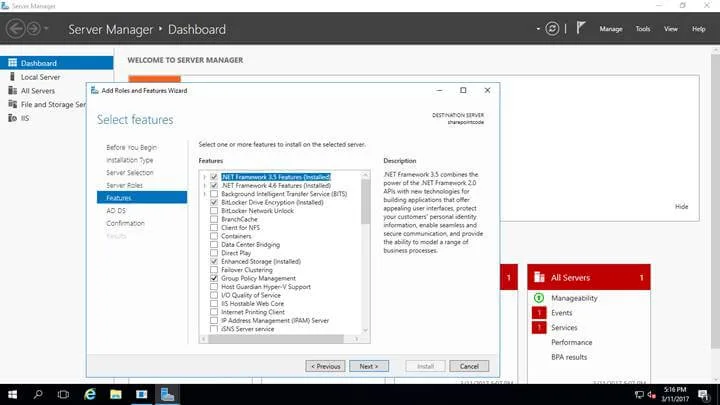
- Proceed by clicking Next.
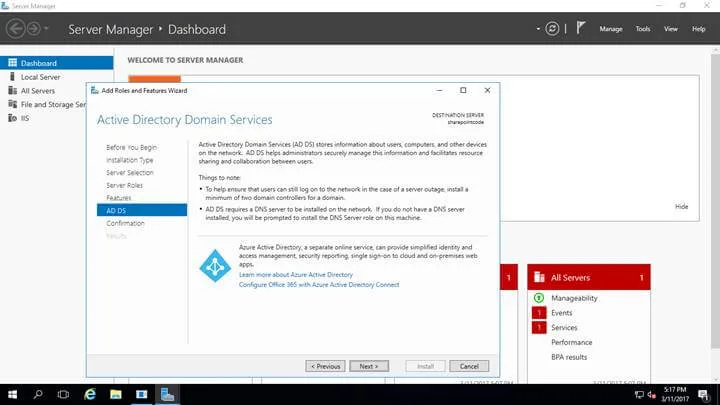
- Follow the steps, as shown in the screenshot, and click Next.
- Click Restart destination services automatically, then click Install.
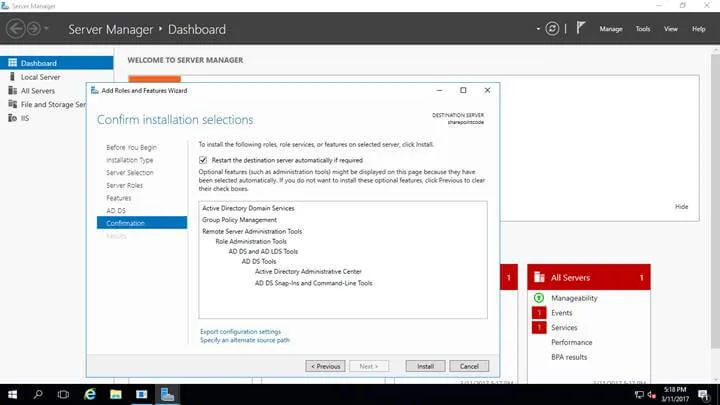
- Close the dialogue box.
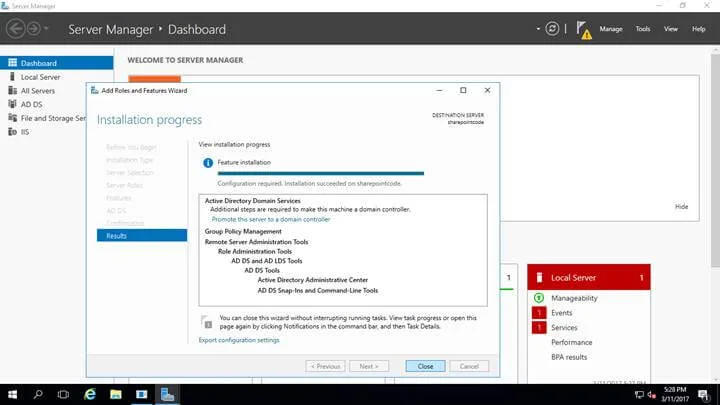
- After successful installation, click “Promote this server into the domain controller.
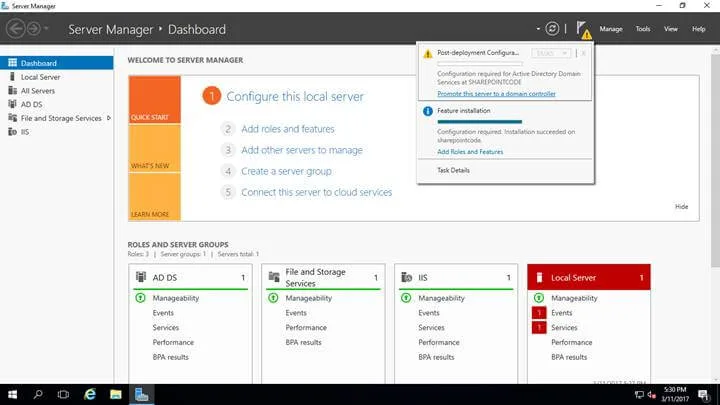
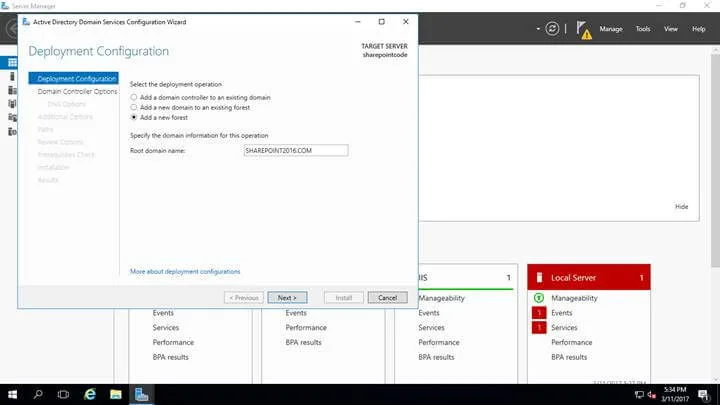
- Now create the forest
- Click Add Forest and provide the root domain name.
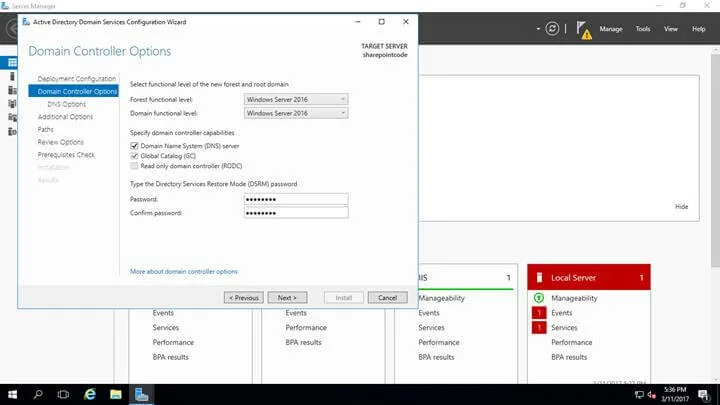
- Click Next and provide the Directory Services recovery password.
- Click Next.
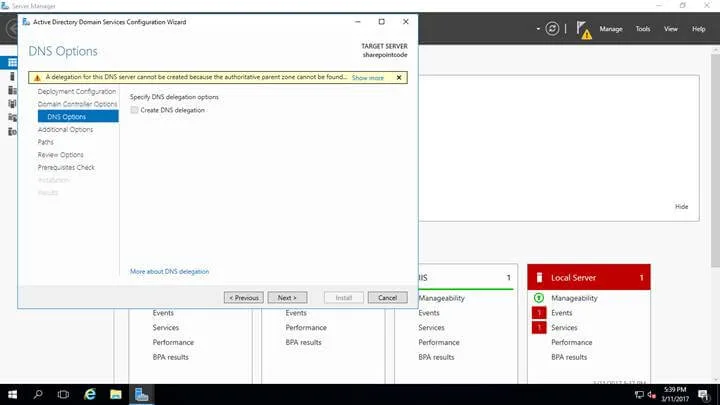
- Leave NETBIOS the NETBIOS default SHAREPOINT2016.
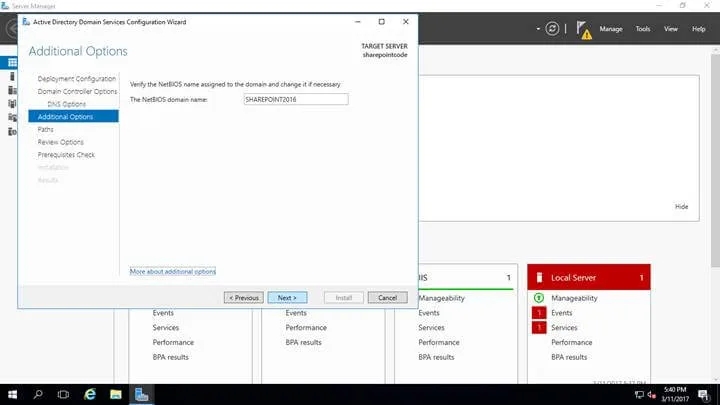
- Provide the location for the AD DS database.
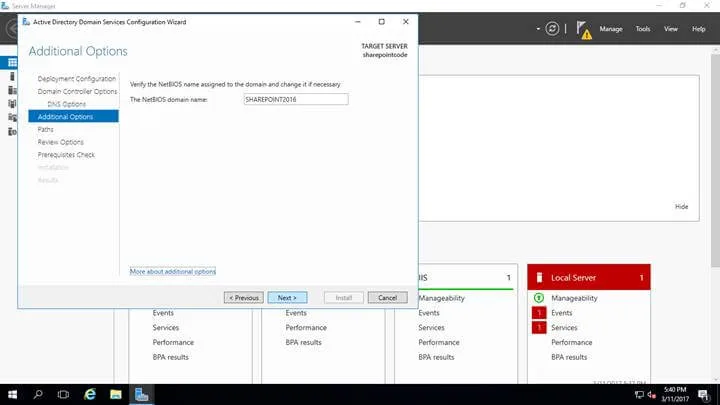
- Click Next and click Install.
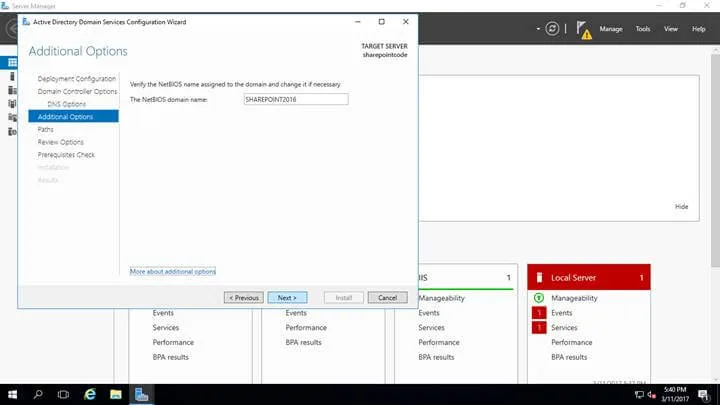
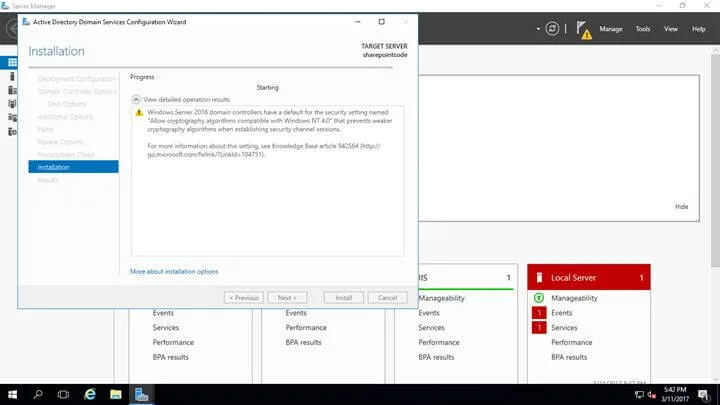
- After successful installation, click Tools -> Active Directory Users and Computers.
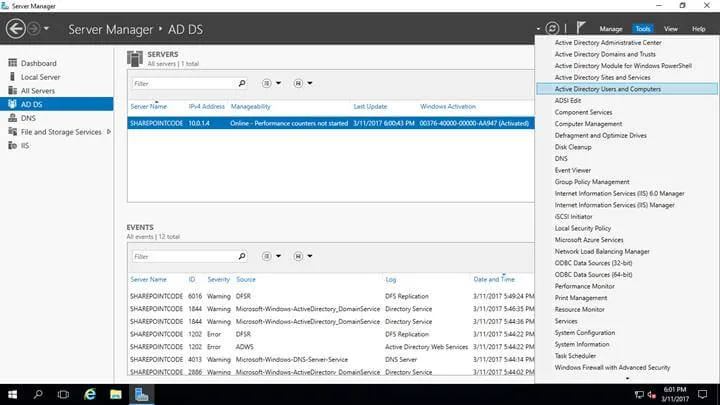
- Follow the screenshot to proceed further.
- After, create a new user icon, create a user name, and provide a password.
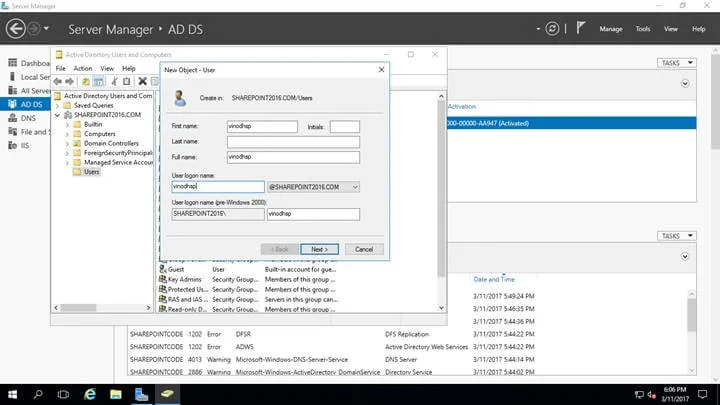
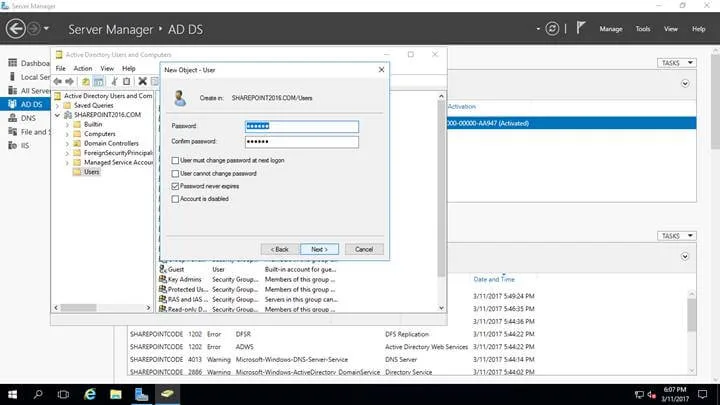
- Click Finish.
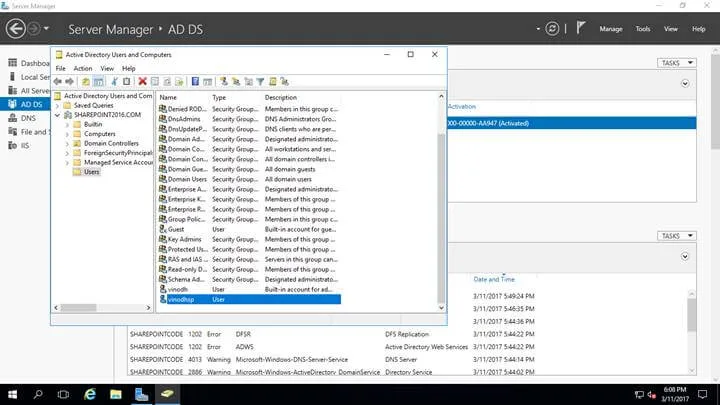
- Let’s log in with a username and password.
